 |
Comment: Sooner or later someone was bound to come up with an excellent,
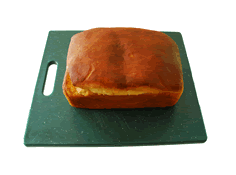
easy to make sandwich bread with consistent results, and hats off to Gluten Free Pantry's Favorite Sandwich Bread mix. Their mix is simple and straightforward 1-2-3, and when baked you have a perfect loaf of bread to be used for French Toast, sandwiches, breakfast toast, etc. Prep & Baking time: 90 minutes Yield: 16-18 slices (estimate as it depends on the slice thickness) |
| Ingredients: One box Whole Foods GlutenFree Sandwich Bread Mix that requires water, butter and eggs. |
|
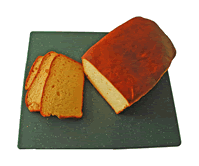
| Preparation: Follow preparation instructions on the box for either a bread machine or oven baked. Note: We use the oven method and when in its rising stage, be sure to let it rise to top of baking pan as we find that less-rise can affect the final shape of the loaf. After baking the bread: When you take the bread out of the oven flip it out of the pan on to a wire rack bottom-side-up and then flip it right-side-up allowing it to cool completely before slicing (but a slice of warm bread with butter is always a special treat). At times our oven plays tricks on us and internal heat may not be consistent, so if one side of the bread is higher than the other - and while still hot from the oven - we place a wire rack on the high side with a weight on the rack (a one pound weight is more than enough) and allow that side to depress to the same height as the other side and once that happens, we remove the weight and the loaf retains its form. Slicing the baked bread:  The slicing can be a bit tricky but over time you’ll be OK. Set the loaf on a cutting board and use a serrated knife to cut it into slices and you’ll wish you had a cutting guide for cutting even thickness slices and our search for one has been unsuccessful. Nonetheless, cut the loaf into everyday bread thickness slices, use what you want and freeze the rest for use at a later time. Freezing the baked bread: When preparing for freezing, lay one slice on top of a common plastic food wrap and fold the wrap over that piece – front to back. Then pull the next layer of wrap over that slice and now cut the wrap so that you are forming a plastic cover over both slices to be frozen as pairs. Continue this process until all slices have been paired and wrapped, and then freeze. When preparing for use, unwrap the pair completely, remove the plastic wrapping and micro on a paper plate for 1 minute after which you’re ready to use the bread for whatever purpose you have in mind. If for a sandwich, you may want to lightly toast it first but that’s optional. |
|
 |
Gluten Free |
 |
Home Style Cooking |
||
Satisfying a Multi Choice Gluten Free Appetite |